How to choose key images from a DICOM directory

Medical imaging, such as MRI, CT scans, and others, often comes in the form of a DICOM directory containing multiple slices or views. Depending on the type of scan, the dataset can include a wide range of images:
- MRI scans often contain 100–200 images, especially for detailed studies like the spine or brain.
- CT scans typically have 50–150 images, depending on the area scanned and slice thickness.
- Ultrasounds may include dozens of snapshots or dynamic clips.
- PET or SPECT scans can have 20–50 images focused on functional activity.
For non-professionals, navigating these large datasets to identify key images can feel daunting. This guide provides general principles to help you select the most informative images across various imaging modalities, ensuring you can focus on the most relevant slices without being overwhelmed.
⚡ New: Auto Select Feature
If you upload a full DICOMDIR folder, you don’t have to manually scroll through hundreds of slices. Our Auto Select feature can automatically choose a set of representative key images for you. You can then review and fine-tune the selection before running the AI analysis.
This is a quick way to get started without worrying about missing important views. For a step-by-step tutorial on using Auto Select in X-ray Interpreter, check out our Getting Started guide →
Understand the Basics
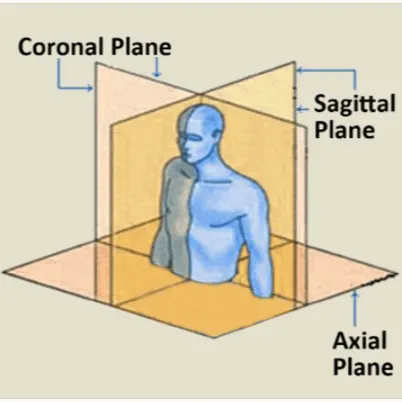
Medical imaging datasets often consist of multiple "slices," each representing a thin section of the scanned area. These slices can be viewed in different planes:
-
Axial (Top-Down): Horizontal slices that give a cross-sectional view.
-
Sagittal (Side): Vertical slices that show the body from the side.
-
Coronal (Front): Vertical slices that show the body from the front.

Understanding these planes helps you know which views to prioritize based on the area of interest. For example, axial views are great for cross-sectional details, while sagittal views are ideal for alignment and curvature.
General Principles for Selecting Key Images
-
Focus on the Region of Interest (ROI):
- Identify the specific body part or condition being assessed (e.g., lumbar spine, chest, brain).
- Look for images that show the clearest representation of this region.
-
Choose Representative Slices:
- Aim to select 3–5 images per view or plane.
- Include slices that highlight abnormalities or critical anatomical features.
-
Use Different Views:
- Explore axial (top-down), sagittal (side), and coronal (front) views if available.
- Each view provides unique information about the anatomy.
-
Rely on Visual Clarity:
- Pick slices where the structures (e.g., bones, tissues) are most visible and well-defined.
-
Use a DICOM Viewer:
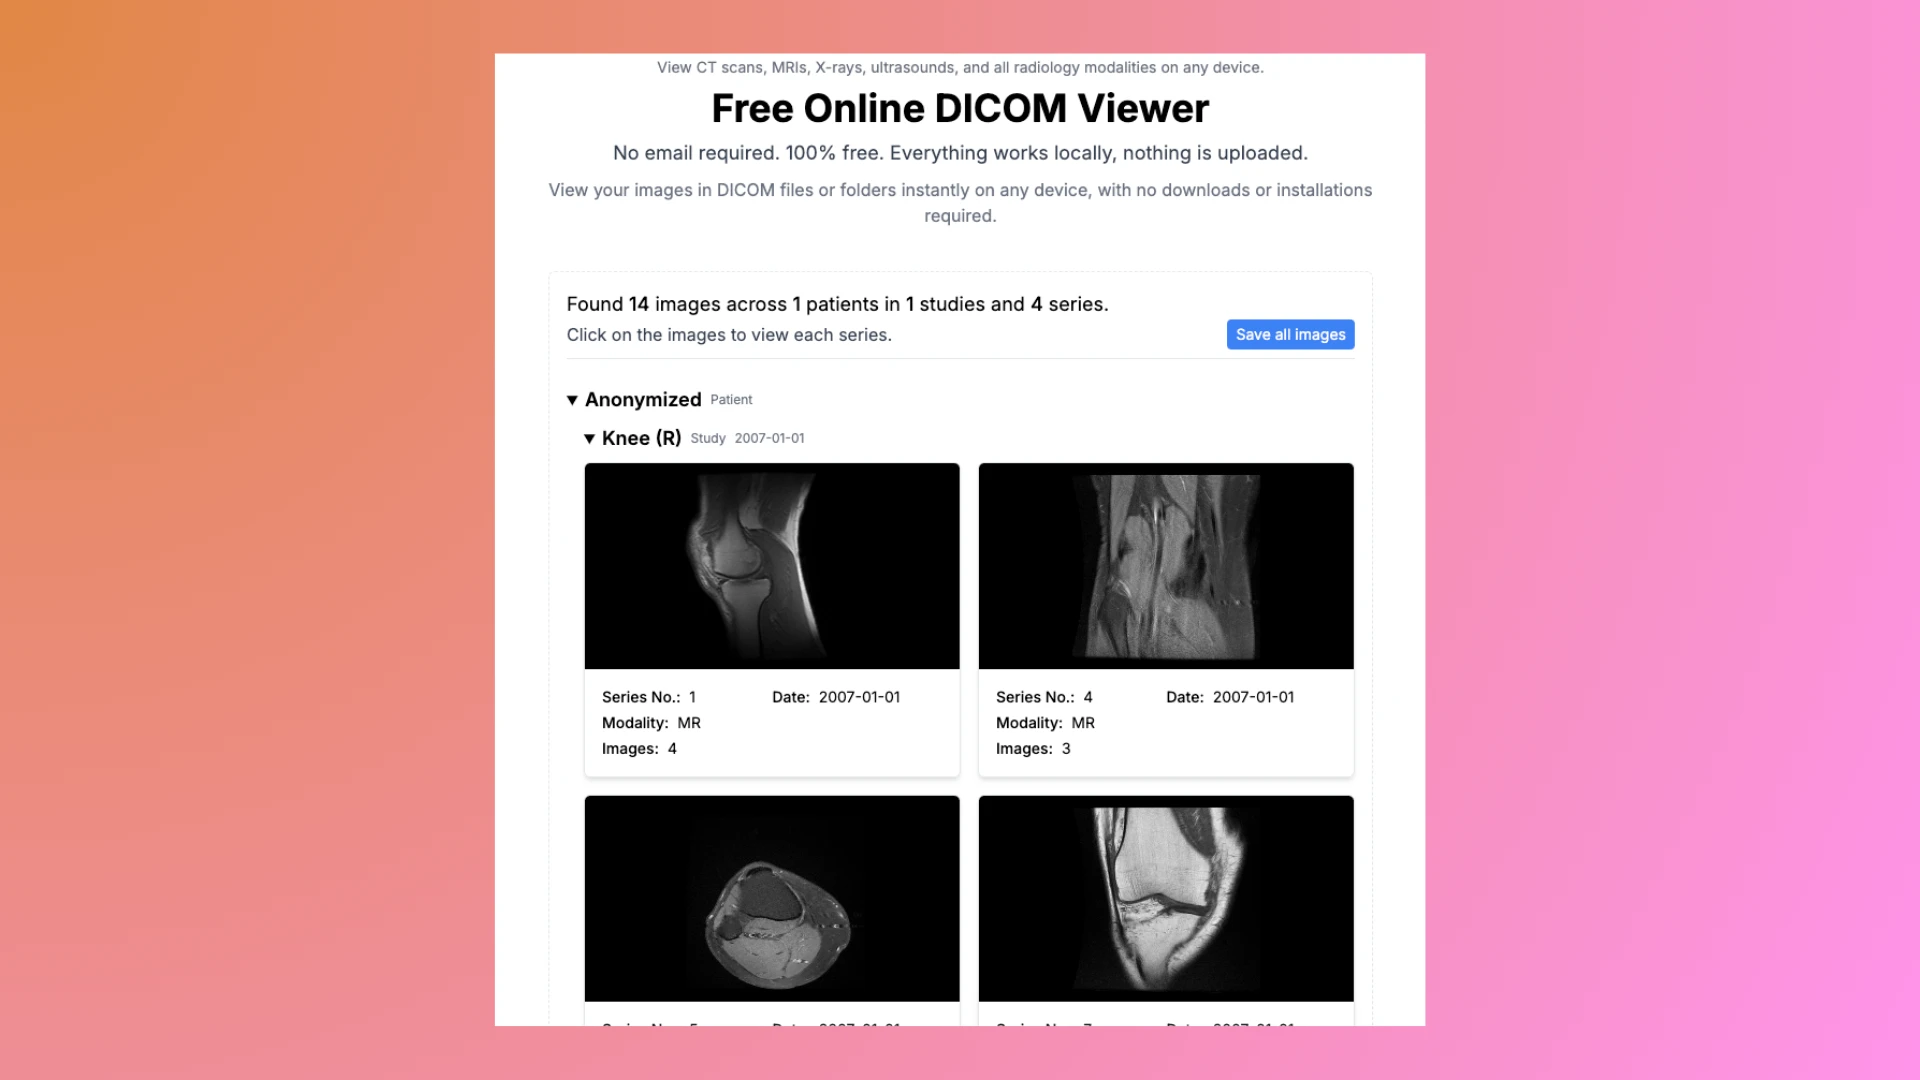
- To make it easier to choose images, try our free DICOM viewer.
- The viewer allows you to:
- Scroll through the images to find the clearest ones.
- Identify the mid-sagittal slice and key axial slices.
- For a complete guide on how to use the viewer, check out this resource.

Specific Guidance by Imaging Modality
MRI (Magnetic Resonance Imaging)
- Best for: Soft tissues, such as brain, spine, joints, and organs.
- Views to prioritize: Sagittal and axial views, with additional coronal views if needed.
- Example: For a lumbar spine MRI:
- Choose a mid-sagittal slice to show alignment and curvature.
- Select axial slices at intervertebral disc levels for detailed views of discs and spinal canal.
CT (Computed Tomography)
- Best for: Bones, lungs, and quick assessments of internal organs.
- Views to prioritize: Axial slices, with coronal and sagittal reconstructions if available.
- Example: For a chest CT:
- Select slices showing the lungs, mediastinum, and any suspicious areas.
- Include slices at the levels of major abnormalities or lesions.
X-Rays
- Best for: Bones, chest, and simple evaluations.
- Views to prioritize: Typically only frontal (AP/PA) and lateral views.
- Example: For a chest X-ray:
- Use the frontal view to assess the lungs, heart, and diaphragm.
- Include the lateral view for a better look at the lung bases and spine.
Ultrasound
- Best for: Dynamic imaging of soft tissues, vessels, and organs.
- Views to prioritize: Technician-selected snapshots of key regions.
- Example: For an abdominal ultrasound:
- Include images showing the liver, gallbladder, kidneys, and any abnormalities flagged during the scan.
PET or SPECT Scans
- Best for: Functional imaging, such as detecting cancer or brain activity.
- Views to prioritize: Slices showing the highest activity or areas of concern.
- Example: For a PET scan:
- Choose slices highlighting abnormal metabolic activity.
Tips for Non-Professionals
- Start in the Middle: Begin with slices in the middle of the dataset, as these often provide the clearest views of the region of interest.
- Scroll and Compare: Use a DICOM viewer to explore different slices and views, comparing features to find the most informative images.
- Don’t Overanalyze: Focus on obvious, well-defined slices rather than trying to interpret everything.
Limitations and Disclaimer
- AI tools can assist, but they are not a replacement for professional advice.
- Always consult a healthcare provider or radiologist for accurate interpretation and diagnosis.
- This guide is meant for general informational purposes and should not be considered medical advice.
By following this guide, you can confidently choose key images from various types of scans while understanding their general significance. Always remember that a qualified healthcare professional is the best resource for interpreting your imaging results.