Getting Started with X-ray Interpreter

Welcome to X-ray Interpreter! Our platform leverages advanced AI technology to provide accurate interpretations of X-rays and other medical images. Whether you are a medical professional, student, or a curious non-professional, this guide will help you get started quickly.
⚡ New Features (Released September 2025)
We’ve added two exciting improvements:
- Upload multiple images at once – select several images or slices in one go for batch analysis.
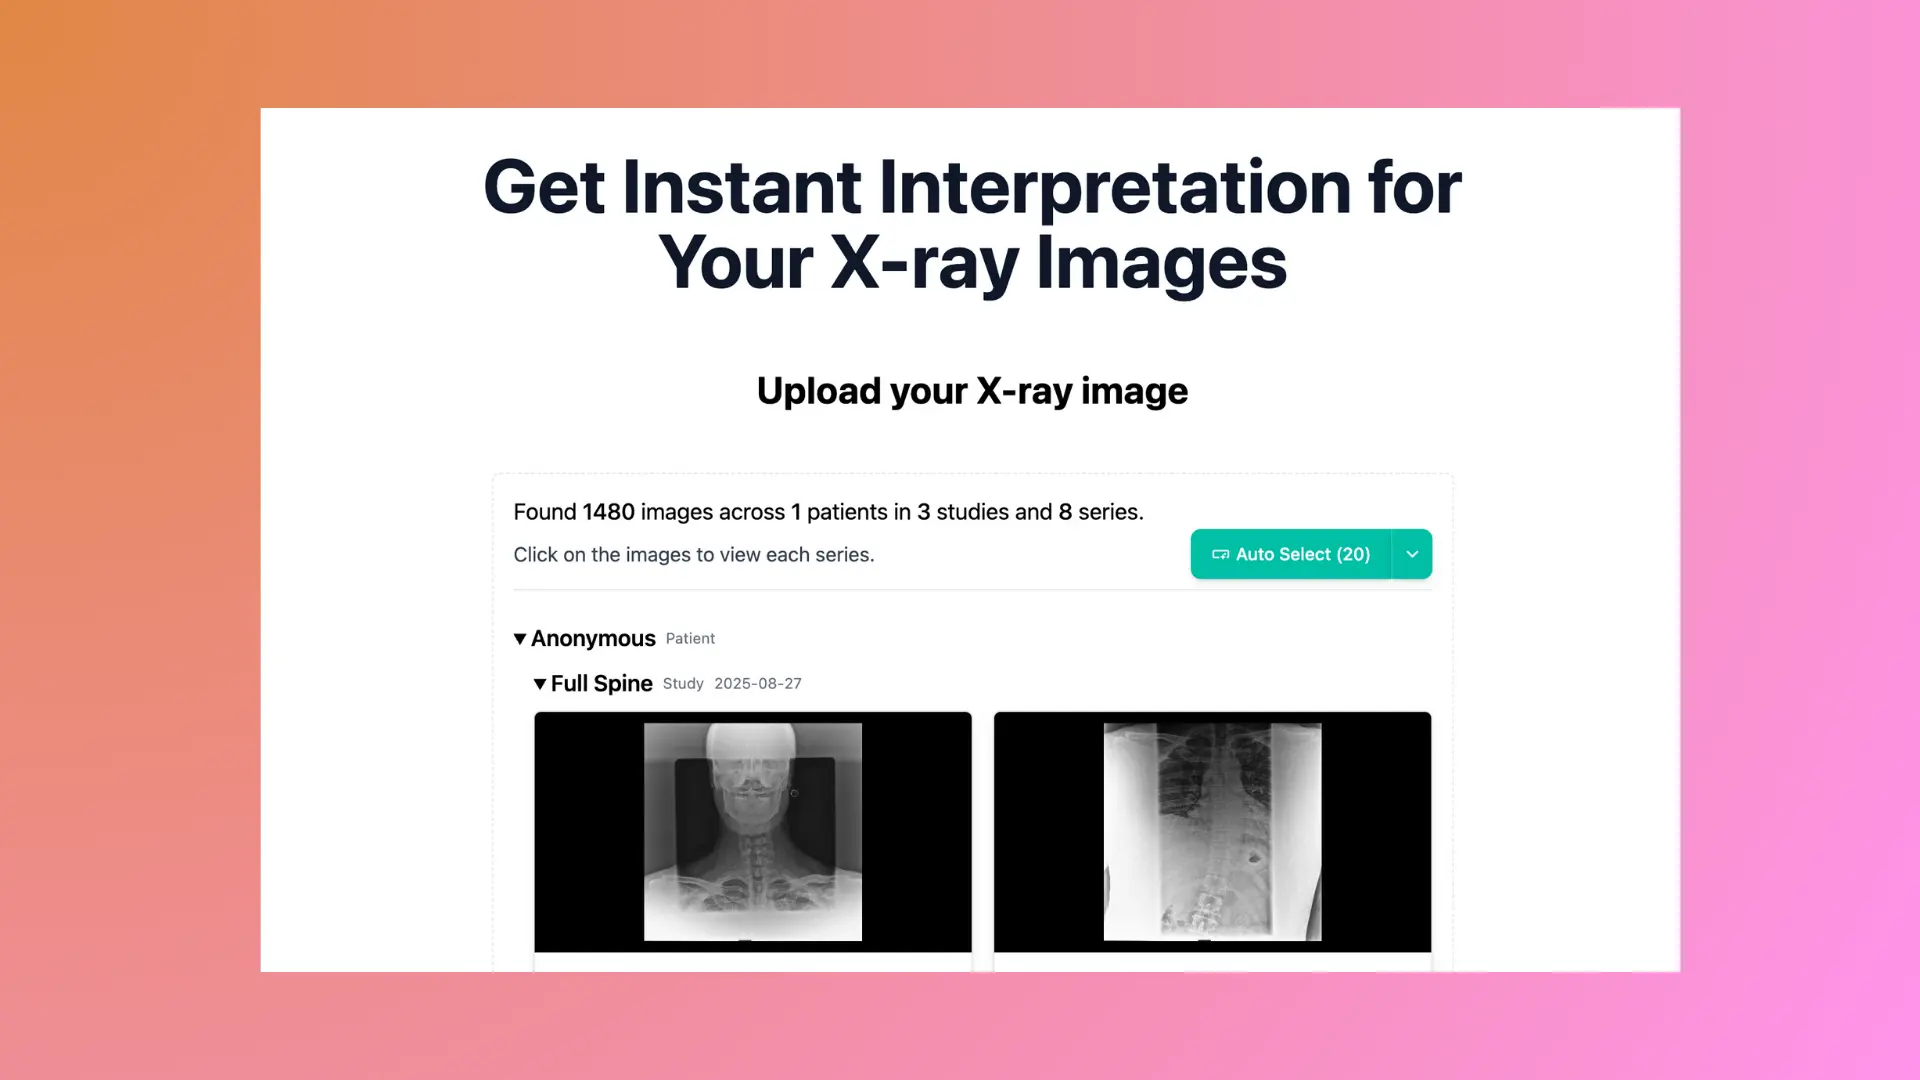
- Auto Select from DICOMDIR – if you have a full DICOM directory, Auto Select will automatically choose representative key images for you.
1. Sign In
- Sign in using your Google account to access X-ray Interpreter.
- Your account tracks your uploaded images and analysis history.
2. Upload Images
You can now upload one or multiple images at once, and even add more images after your initial selection:
- Navigate to the Interpret page.
- Click the Upload image(s) button to select files.
- Supported formats: JPG, PNG, WebP, PDF, and DICOM.
- For multiple uploads, hold
Ctrl(Windows) orCmd(Mac) while selecting files. - You can upload additional images after the first batch by clicking the button again.
- Ensure that images are clear and high-resolution for the best AI results.
3. ⚡ Auto Select for DICOMDIR (Optional)
If you have a DICOMDIR folder containing many images:
- Click the Select DICOM directory button to choose the folder.
- Make sure the folder contains a file named DICOMDIR.
- If you have a zip file, unzip it first before selecting the folder.
- After all images are loaded, the Auto Select button will appear. Use it to automatically pick representative key images.
- Review the suggested images and make adjustments as needed before submitting.
- This is especially useful for large MRI or CT studies with hundreds of slices.
- Privacy note: We respect your privacy. No personally identifiable health (PIH) information will be collected or uploaded. All image processing happens locally on your computer, and only the images you explicitly choose will be uploaded.
Full guide for manual key image selection →
4. Purchase Image Analysis Credits
- If your credit balance is insufficient, a Purchase button or link will appear, redirecting you to the Pricing page.
- Select a bundle with enough credits for your analysis.
- Follow the on-screen prompts to complete your purchase.
- You can view all your purchase history in My Credits.
5. Submit and Receive Interpretation
- Click Interpret to run the AI analysis on your selected images.
- The report is generated within moments, providing a detailed interpretation.
6. Review and Save Interpretation
- Examine the AI-generated report carefully.
- You can download or print the report for your records.
- All your reports can be found in My X-rays.
7. Explore Additional Resources
- Visit our Resource Center for tutorials, FAQs, and tips to enhance your understanding.
8. Contact Support
- If you encounter any issues or have questions, contact our support team via the Contact section on the website.
By following this guide, you can quickly upload images, leverage Auto Select for DICOMDIR folders, and get accurate AI interpretations. Whether you are analyzing a single X-ray or a large set of MRI or CT images, X-ray Interpreter makes it easier to focus on the most relevant slices and get results efficiently.